From the books/photobooks page, click the "Design Categories" button. To get started, first choose your Category and then the desired "Book size," then choose a "Design Theme." Lastly, choose your "Template." This will bring up another 'design window.' You may start creating your book or photo book online. After the webpage loads you'll see a design window like the graphic snapshot below with button options, add custom images option, and cover with other pages.
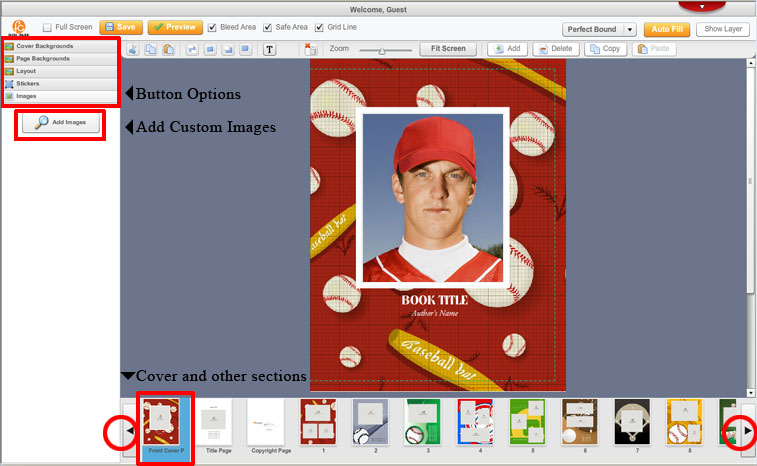
Notice, the main widow where the book cover is located. On the left side are options, in button form. You must click these options to the corresponding thumbnail graphics at the bottom of the screen. These thumbnail graphics at the bottom of the screen (starting with the cover), are the pages inside your custom book. To navigate to the previous or next page, click the black arrows (at the bottom of the screen). Let's get started.
1) FRONT COVER- Under the "Add Images" button on the left side, add a custom image to your cover design. (*Remember, to upload a high-resolution 300 dpi JPG image, if you want a custom cover design.) Drag the custom image to the main window, to fit inside the white area, as seen in the cover example above. Now add the book title and the author's name.
2) TITLE PAGE- Add an image to the title page. Drag the custom image to the main window, to fit inside the image area. Now add your personal text.
3) COPYRIGHT PAGE- No editing is required.
4) PAGE #1- This is the first page of your book. Add image(s) to the page. Drag the image(s) to the main window, to fit inside the image area.
5) PAGE #2-20- Complete your book by adding images and/or text. Add image(s) to the page. Drag the image(s) to the main window, to fit inside the image area.
6) Back Cover Page- This is the back cover page of your book. Leave the page as is and click save and preview. Or add image(s) and/or text to the page. Drag the image(s) to the main window, to fit inside the image area. *NOTE: Remember white text looks better on colored backgrounds. If you add text, highlight it and change the text color to white. *Note, your photo book, cookbook or book should now be complete. Make sure to click "SAVE" then "PREVIEW" for a preview of your book.