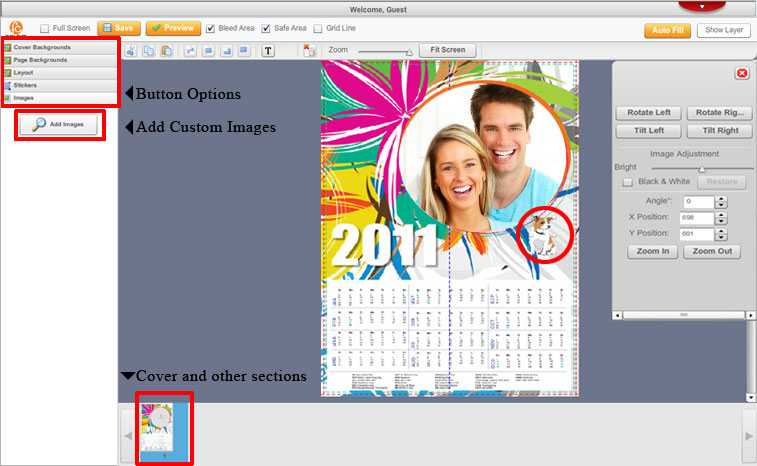
From the calendars page, click the"Design Categories" button. To get started, first choose (your calendar style), then choose a ("Design Theme). Lastly, choose your "Template." This will bring up another 'design window.' You may start creating your calendar online. If you choose to design a wall calendar, you'll see a design window like the graphic snapshot below with button options, and add custom images option.
Wall Calendar—

Notice, the main widow where the wall calendar is located. Let's get started.
1) WALL CALENDAR- Under the "Add Images" button on the left side, add a custom image to your calendar. (*Remember, to upload a high-resolution 300 dpi JPG image, if you want a custom cover design.) Drag the custom image to the main window, to fit inside the photo area, as seen in the example above.
2) ADD STICKERS (Clipart)- You may choose to add clipart or "Stickers." Choose the stickers button, on the left side. Select desired sticker(s), and drag them to the canvas or main window. (Notice the options. You may rotate or tilt the image. You can also scale the image larger or smaller. *Note, you may want to add some text near the photo i.e. (your names or pets name, etc.).
*Note, your calendar should now be complete. Make sure to click "SAVE" then "PREVIEW" for a preview of your calendar.
Monthly Calendar—
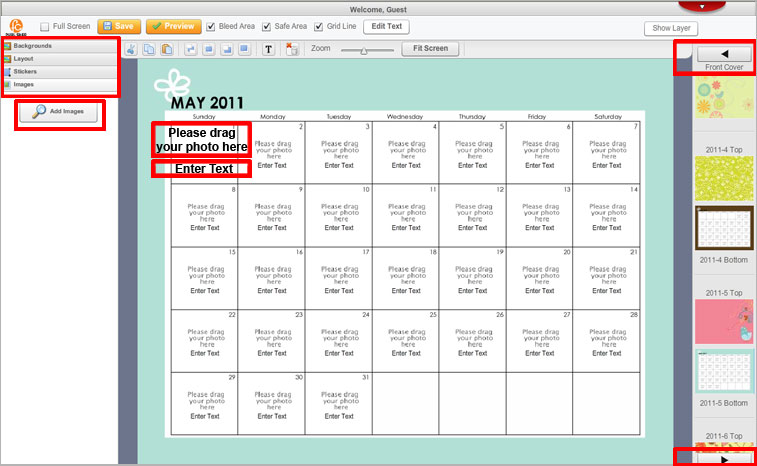
If you choose to design a monthly calendar, you'll see a design window like the graphic snapshot below with button options, and add custom images option.

1) MONTHLY CALENDAR- Under the "Add Images" button on the left side, add a custom images to your calendar, if you want images on the days. You may also include some text on the days. (*Remember, to upload a high-resolution 300 dpi JPG image, if you want images on your calendar.) Drag the custom images to the main window, to fit inside the days of the week, as seen in the example above. *If you desire, you can change the background images. Choose background button on the left side, then your theme, to have a different background image for a particular month. Drag the image to the screen, to change the background image for a specific month. Click the small thumbnails - on every other month to view the days/weeks of the month. Custimize each month. After customizing each month, then save and preview your calendar. *Note, to navigate through the calendar, use the arrows on the right side of your screen.
*Note, your calendar should now be complete. Make sure to click "SAVE" then "PREVIEW" for a preview of your calendar.